A staple gun is crucial for picture framing as it provides a quick and secure method to affix canvas or paper to frames. It ensures a neat and professional finish, enhancing the longevity of framed artwork. The tool’s efficiency and ease of use make it indispensable in achieving precise and durable framing results.
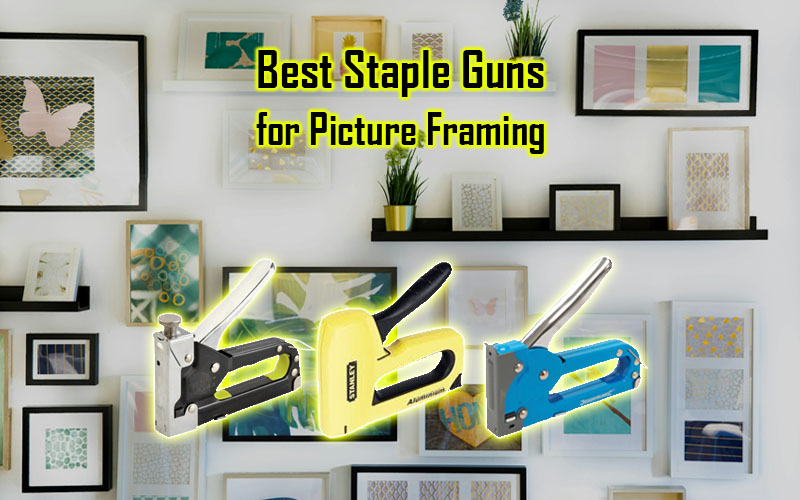
Enter on a picture framing project? The key to a seamless and professional finish lies in the staple gun you choose. We’ve handpicked the six best staple guns for picture framing that effortlessly blend durability, precision, and ease of use.
From heavy-duty options like the Logan F500-2 to the classic Surebonder 9600B Pneumatic T-50, each tool is a powerhouse in its own right.
Let’s transform your cherished memories into beautifully framed masterpieces with the perfect tool for the job!
Can I Use Any Staple Gun for Picture Framing?
You can use any staple gun for picture framing as long as it’s compatible with the thickness of your frame and the type of material you’re stapling into. Look for a staple gun with adjustable settings to ensure proper penetration without damaging your frame or artwork. Make sure to use the appropriate size and type of staples for your project to achieve the best results and secure the picture firmly in place.
6 Best Staple Guns for Picture Framing – Staple Your Success
Are you ready to take your picture-framing skills to the next level? The right staple gun can make all the difference, ensuring your frames are sturdy and precise and showcase your cherished memories in the best possible way. We’ve scoured the market to bring you the 6 best staple guns for picture framing. Read on to discover the perfect tool for your next project!
1. Logan F500-2 Dual Point Driver Elite – Top Pick

The Logan F500-2 Dual Point Driver Elite is a game-changer in the world of picture-framing tools. With its enhanced design, it effortlessly handles both flexible and rigid points, delivering superior downward pressure on materials for a secure fit.
The comfortable rubber grip on the handle makes framing a breeze, requiring 50 percent less grip force, ensuring a comfortable and efficient user experience. This package comes complete with a 1-point driver, 50 flexible points, 50 rigid points, and clear instructions.
The inclusion of points F53, F54, F55, and F56 refills adds to the convenience and versatility of this tool. The Logan F500-2 not only simplifies the framing process but also accelerates it with its user-friendly features.
Its sleek appearance complements its high-quality performance, making it a valuable addition to any framing toolkit. Investing in the Logan F500-2 Dual Point Driver Elite guarantees top-notch performance, ease of use, and exceptional value for picture-framing enthusiasts.
Pros:
- Effortlessly secures flexible and rigid points.
- Comfortable rubber grip reduces hand strain.
- Easy-to-follow instructions.
- Versatile with included refills.
- Sleek design enhances appearance.
Cons:
- Limited color options.
2. Surebonder 9600B Pneumatic T-50 Type Upholstery Stapler Kit – Best Overall

The Surebonder 9600B Pneumatic T-50 Type Upholstery Stapler Kit is a heavy-duty yet lightweight tool that simplifies DIY projects. The kit includes a durable carrying case, 6250 staples in five different lengths, an Allen wrench, a bottle of tool oil, and the staple gun itself.
The stapler requires an air compressor (not included), with a recommended PSI range of 60-100. This versatile tool is user-friendly and ideal for various applications such as upholstery, insulation, screen repair, woodworking, and fencing.
It significantly speeds up projects, making repairs a breeze. The stapler features safety mechanisms to prevent accidental firing, including an adjustable air exhaust, a rubber-cushioned handle for comfort, and a quick-release magazine for easy staple loading.
The kit’s staple assortment (1/4″, 5/16″, 3/8″, 1/2″, and 9/16″) caters to different project needs. The staple gun’s features, including a staple view window and firing safety mechanism, enhance usability. The inclusion of a carrying case ensures convenient storage when not in use.
In summary, the Surebonder 9600B is a reliable, efficient, and user-friendly pneumatic stapler that facilitates a wide range of DIY projects.
Pros:
- Lightweight and user-friendly.
- Versatile for various applications.
- Safety features prevent accidental firing.
- Includes a durable carrying case.
Cons:
- Requires a separate air compressor.
- Limited to pneumatic operation.
3. DEWALT – GID-286785 DWHTTR350 Dewalt Heavy-Duty Aluminum Stapler

The DeWalt Heavy-Duty Aluminum Stapler, model DWHTTR350, is a standout tool for any DIY enthusiast. This multi-colored stapler boasts a modern design and is made from a durable blend of materials, measuring 10.8 x 9.4 x 2 inches and weighing a mere 1 pound.
In terms of quality, performance, power, value, and weight, this DeWalt stapler excels. Its ease of rolling and use make it a top-notch choice for various projects.
One user shared their satisfaction, using the stapler for both putting up signs on their land and reupholstering dining room chairs. The tool proved rugged, well-engineered, and dependable, earning a resounding “Bravo.”
For those seeking a powerful and heavy-duty stapler, the DeWalt DWHTTR350 is a perfect match. Users praise its flawless stapling and even its capability to handle nails in tough wood. Though occasional jams may occur, a simple tap with a hammer resolves the issue.
Remarkably lightweight, this stapler exceeds expectations, leaving users delighted with their purchase. Overall, the DeWalt Heavy-Duty Aluminum Stapler is a reliable and satisfying addition to any toolkit.
Pros:
- Rugged and well-engineered design.
- Dependable performance for various DIY projects.
- Lightweight and easy to use.
- Handles tough wood with ease.
- Versatile as both a stapler and a brad nailer.
Cons:
- Occasional jams may require manual intervention.
- Nails in very hard wood may sometimes protrude slightly, necessitating a tap with a hammer.
4. QUTUNI Point Driver for Picture Framing

The QUTUNI Point Driver for Picture Framing is excellent for DIY enthusiasts and professionals alike. Crafted from high-strength aluminum alloy, this tool is compact and lightweight without compromising durability.
The absence of a power supply requirement and its spring rebound operation make it incredibly user-friendly. The easy-to-load magazine holds 200 rounds, minimizing reload hassles. Adjusting the point depth is a breeze with the rotating feature.
This framing tool is not just about convenience; it’s designed for efficiency. The improved model delivers robust downward point pressure, with a rubber handle reducing grip force by 50%, making it accessible for those with weaker hand strength.
The result is a perfect, clean finish without tearing or denting the backing material or splitting the wood frames. Measuring 6.7″ x 4.7″ x 1.6″ and weighing only 2 lbs, this staple gun comes with 1000 flexible points, each sized at 15mm * 5mm * 0.33mm.
The product’s versatility shines through, as it effortlessly secures points into MDF frames with zero wiggle, promising a clean and hassle-free installation. For a low-cost, efficient option that outshines traditional methods, the QUTUNI Point Driver is a must-have for framing projects.
Pros:
- Lightweight and compact design for easy handling.
- Simple operation with no power supply needed.
- Comfortable rubber handle reduces grip force.
- Efficient point depth control.
- Durable aluminum alloy construction.
Cons:
- Limited to softwoods and MDF.
- Not tested on hardwoods.
5. Yeeyeah Heavy Duty Staple Gun for Picture Framing

The Yeeyeah Heavy Duty Staple Gun for Picture Framing is a versatile and robust tool that stands out for its exceptional features. The 3-in-1 staple gun, made of high-quality metal, handles D-shaped, U-shaped, and T-shaped staples with ease.
Adjusting the pressure is a breeze with the screw button, ensuring compatibility with various materials. The package includes 1000 durable D-shaped staples for extended use.
The canvas stretcher pliers, constructed from premium steel, come with rubber pads in the 4-3/4″ wide mouth-fitting jaws, preventing slippage and protecting your canvas. The staple remover, designed for effortless staple removal, is lightweight and ergonomic, making it ideal for various applications.
This tool combo kit is a game-changer for artists, DIY enthusiasts, and professionals alike. Whether stretching canvas for oil paintings, assembling picture frames, or tackling upholstery projects, this set has you covered.
The quick and easy reloading feature, along with the staple-viewing window, adds to the overall convenience. Yeeyeah assures 100% satisfaction and offers 24/7 online support. Invest in this kit for efficient, high-quality work every time.
Pros:
- Heavy-duty construction ensures durability.
- Easy pressure adjustment for different materials.
Cons:
- It may be slightly heavy for prolonged use.
- The staple-viewing window could be larger for better visibility.
6. BEVISKkki Point Driver 2000 Points Professional Picture Framing Stapler

The BEVISKkki Point Driver 2000 delivers a professional touch to picture framing, earning its place as a reliable tool in the framing industry. Crafted from high-quality steel, this manual point driver ensures durability and stability when securing frames or backplates, preventing any unwarranted falls.
The ergonomic design, featuring a comfortable rubber grip, makes it a breeze to operate, and its lightweight construction adds to the user-friendly experience. What sets this framing stapler apart is its precision in replacing cumbersome wooden cleats, nails, or staples that often fall short.
Adopting the spring rebound principle requires no external power or air, simplifying the reassembly of frames and cushions. With 2000 flexible points included, this tool works seamlessly on various wood types, from pine to walnut.
The convenient front loading and depth adjustment, coupled with the acceptance of 5/8 inch length flex points fasteners, make it versatile for any framing project.
Press the trigger, and the frame points effortlessly pierce the surface without damaging the wooden frame. The BEVISKkki Point Driver 2000 is a must-have for framing enthusiasts, combining efficiency, ease of use, and professional results.
Pros:
- Durable steel construction ensures stability.
- Ergonomic design with a comfortable grip for easy operation.
- Front loading and depth adjustment enhance convenience.
- Versatile on various wood types.
- Effortlessly pierces frames without damage.
Cons:
- Manual operation may require more effort.
- Some users may prefer a powered option for heavy use.
- Specific to wooden picture frames.
What to Look for Before Buying a Staple Gun for Picture Framing?
When it comes to picture framing, a reliable staple gun is an indispensable tool for securing the corners of your artwork with precision and strength. With numerous options available in the market, it’s crucial to understand the key features that make a staple gun suitable for your framing needs.
Staple Size and Compatibility
The first and foremost consideration is the staple size and compatibility of the gun. Different framing projects may require various staple lengths, so it’s vital to choose a staple gun that accommodates a range of sizes. Look for a model that supports standard sizes such as 1/4-inch, 3/8-inch, and 1/2-inch staples. This versatility ensures that you can use the staple gun for a variety of framing tasks, from delicate projects to more robust materials.
Magazine Capacity
The magazine capacity of a staple gun determines how many staples it can hold before requiring a reload. Opt for a staple gun with a larger magazine capacity if you plan to tackle sizable framing projects without interruptions. A staple gun with a high-capacity magazine minimizes downtime spent reloading, allowing you to work efficiently and complete your framing tasks more quickly.
Ease of Use and Ergonomics
Nobody wants a staple gun that feels cumbersome or strains their hand after extended use. Choose a staple gun with a user-friendly design and ergonomic features. Look for a model that offers a comfortable grip, easy maneuverability, and a balanced weight distribution. An easy-to-squeeze trigger is also essential, especially if you have multiple framing projects or large batches of frames to complete. Prioritize a staple gun that minimizes user fatigue, ensuring a smoother and more enjoyable framing experience.
Adjustable Staple Depth
Different framing materials require varying staple depths to achieve optimal results. A staple gun with adjustable staple depth settings allows you to customize the penetration of the staple into the frame. This feature is particularly crucial when working with delicate materials or when you want to control the depth to avoid damage to the artwork. The ability to fine-tune the staple depth enhances the versatility of the staple gun, making it suitable for a broader range of framing applications.
Jam-Free Mechanism
Picture framing requires precision, and a staple gun that frequently jams can be a frustrating hindrance. Look for a staple gun with a jam-free mechanism that minimizes the risk of staples getting stuck or misfiring. A reliable anti-jam feature not only saves time but also ensures a smooth and uninterrupted framing process. Some models come with clear indicators or easy-to-access mechanisms for clearing jams quickly, adding to the overall user-friendly experience.
Durability and Build Quality
Investing in a durable and well-built staple gun is essential for long-term reliability. Choose a model constructed from high-quality materials that can withstand the rigors of regular use. A sturdy housing, reinforced internal components, and a durable magazine are indicators of a staple gun’s overall build quality. A durable staple gun not only provides value for money but also instills confidence in its ability to handle various framing projects over time.
Safety Features
Safety should always be a priority when working with tools, and a staple gun is no exception. Look for safety features such as a locking mechanism to prevent accidental firing when not in use. Some models also have a safety switch or a two-step trigger to reduce the risk of unintentional stapling. Prioritize a staple gun that incorporates these safety features to ensure a secure and accident-free framing experience.
Brand Reputation and Reviews
Before making a final decision, consider the reputation of the brand and read customer reviews. A reputable brand with positive feedback from users is more likely to provide a reliable and high-performance staple gun. Look for reviews that specifically mention the staple gun’s performance in picture framing applications, as this firsthand information can offer valuable insights into its suitability for your needs.
What Size Staples Should I Use for Picture Framing?
For picture framing, use medium-sized staples, typically 3/8-inch or 1/2-inch. These sizes strike a balance, providing enough strength to secure the frame without causing damage to the artwork or photo. Make sure to select staples that fit snugly in your staple gun to ensure a secure hold. Using the right size staples ensures your picture remains securely framed without any risk of damage.
How Do You Staple a Picture Frame?
Stapling a picture frame is a straightforward task that requires a few simple steps. Whether you’re a DIY enthusiast or just looking to hang up a cherished photo, follow these clear and easy instructions to get the job done right.
Gather Your Materials
Start by assembling all the necessary materials. You’ll need a picture frame, a staple gun, and staples appropriate for your frame’s thickness. Ensure you have a stable work surface to prevent any mishaps.
Prepare Your Workspace
Lay out a clean and flat workspace to make the process more manageable. A table or workbench is ideal, as it provides a stable surface for your frame. Having all your tools within reach will also save you time and effort during the stapling process.
Insert Staples into the Staple Gun
Load your staple gun with the appropriate staples. Most staple guns have a simple mechanism for loading staples, often involving a sliding tray or a latch. Make sure the staples are secure and positioned correctly to avoid any jams or misfires.
Inspect the Picture Frame
Before you start stapling, inspect the picture frame to ensure it’s in good condition. Check for any loose or damaged corners and fix them before proceeding. A sturdy frame will result in a more secure and long-lasting staple job.
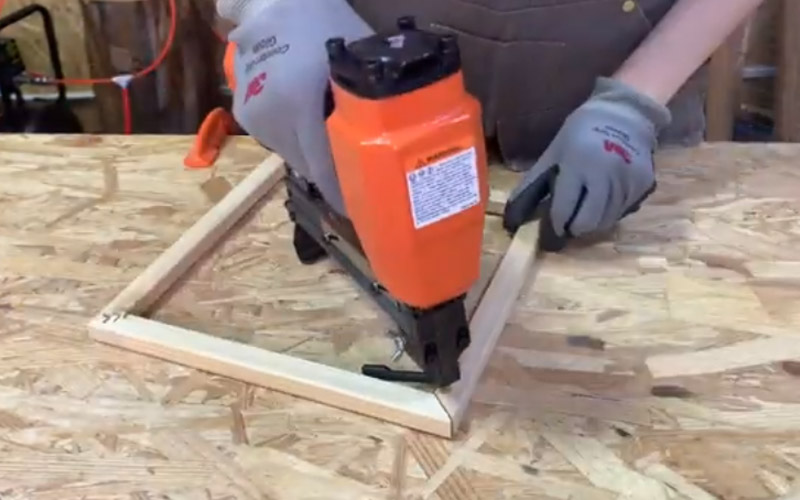
Position the Frame Correctly
Place the picture frame face down on your work surface. This orientation allows you to staple the back of the frame, ensuring a clean and professional appearance from the front. Take a moment to align the corners properly and double-check that the frame is level.
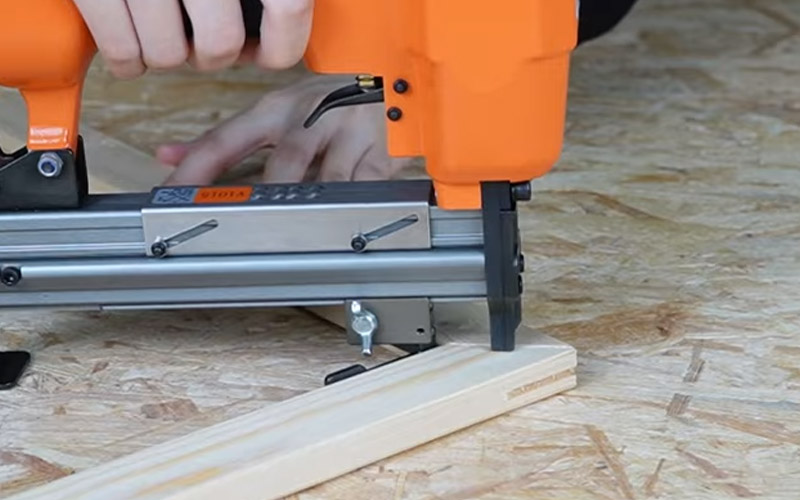
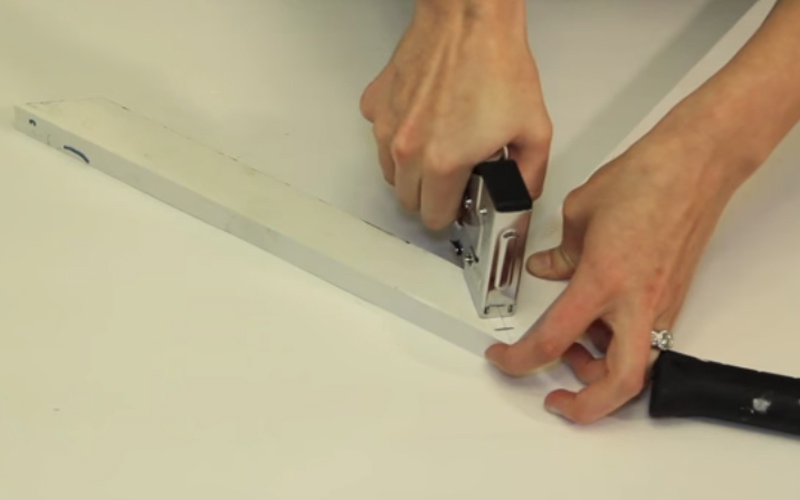
Start Stapling
Position the staple gun at a 45-degree angle to the frame’s edge. This angle helps the staples penetrate the wood more effectively. Press the staple gun firmly against the back of the frame and squeeze the trigger to release a staple. Repeat this process along one side of the frame, placing staples at regular intervals.
Staple Opposite Sides
Once you’ve secured one side, move to the opposite side of the frame and repeat the stapling process. This ensures that the tension is evenly distributed across the frame. Consistent spacing between staples contributes to a neat and professional finish.
Continue Stapling Around the Frame
Work your way around the entire perimeter of the frame, stapling each side with the same care and precision. Keep the staples evenly spaced and maintain a steady hand to avoid crooked or uneven stapling. This step may require a bit of patience, but the result will be a securely fastened frame.
Check for Tension
After stapling all sides, check the tension of the frame by gently pressing on the center. If the frame feels solid and doesn’t flex excessively, you’ve achieved a balanced and well-stapled result. If there’s noticeable give, add additional staples to reinforce the corners.
Trim Excess Material
If your frame has excess backing material protruding beyond the staples, use a utility knife or scissors to trim it away. This step not only enhances the frame’s appearance but also prevents any unnecessary bulk when hanging it on the wall.
Attach Hanging Hardware
If your frame requires hanging hardware, attach it to the back following the manufacturer’s instructions. This could include D-rings, sawtooth hangers, or wire. Ensure the hardware is centered and securely fastened to guarantee a stable and level hanging position.
Hang Your Framed Picture
With the stapling complete and the hanging hardware attached, it’s time to display your framed picture proudly. Choose an appropriate location on the wall, use the appropriate hanging method, and enjoy the fruits of your stapling efforts.
How Can I Avoid Overdriving Staples When Framing Pictures?
To prevent staples from being driven in too far when framing pictures, use a moderate amount of force on the stapler trigger. Avoid excessive pressure to ensure the staples securely fasten without going too deep into the frame. The gentle and controlled squeezing of the stapler will help you achieve the right balance, preventing any damage to your pictures and ensuring a clean and professional finish.
Tips for Effective Picture Framing
Effective picture framing is not just about selecting a frame that matches your décor; it’s an art that enhances the visual appeal of your cherished memories or artworks. Here are some tips to help you achieve picture-perfect framing.
- Choose the Right Frame: Begin by selecting a frame that complements both the artwork and your room’s aesthetic. Consider the color, style, and material of the frame. Wood frames add warmth, metal frames convey modernity, and ornate frames can elevate a classic look.
- Matting Matters: Matting provides a visual buffer between the artwork and the frame, enhancing the overall presentation. Opt for acid-free matting to prevent discoloration over time. Experiment with different mat colors to find the one that enhances your artwork and suits your taste.
- Size and Proportion: Ensure that the frame size is proportional to the artwork or photo. A large frame with a small picture can look overwhelming, while a small frame for a large piece might diminish its impact. Aim for a balanced look that complements the size of your art.
- Consider the Room: Think about where the framed piece will be displayed. Choose a frame that fits the room’s style and color scheme. If the room has a minimalist design, a simple frame may be more suitable, while a more ornate frame can be a focal point in a traditionally styled room.
- Quality Matters: Invest in quality frames to protect your artwork and ensure longevity. Look for frames with UV-protected glass to prevent fading from sunlight. Quality frames also add a touch of sophistication to your display.
- Consistency in Style: If you are framing a series of pictures or artworks, maintain consistency in frame style for a cohesive look. This creates a unified presentation that is visually appealing and harmonious.
- Hanging Height: Consider the eye level of viewers when hanging your framed pieces. Typically, artwork should be at eye level for optimal viewing. This ensures that the art is easily enjoyed without straining the viewer’s neck.
- Grouping Artworks: When hanging multiple framed pieces, create a gallery wall by arranging them in a visually appealing manner. Experiment with different layouts before committing to a final arrangement.
FAQs About Picture Framing Staple Gun
Can you use a staple gun on wood?
You can use a staple gun on wood. It’s a handy tool for fastening materials together, including wood. Simply load the staples, position the gun over the wood, and press the trigger to secure them.
Are electric staple guns safer than manual ones?
Electric staple guns are generally safer than manual ones. They reduce the risk of hand fatigue and provide better precision, minimizing the chances of accidental injuries. With manual staple guns, exerting force increases the likelihood of misfires and injuries. Electric staple guns are user-friendly and decrease the potential for accidents, making them a safer choice for various tasks.
What makes a staple gun ideal for picture framing?
A staple gun is perfect for picture framing due to its simplicity and efficiency. It securely fastens the frame backing, preventing shifting or damage. The ease of use ensures quick framing, while the sturdy staples offer reliable support.
Are narrow crown staples necessary for picture framing?
Narrow crown staples are essential for picture framing. They provide secure and discreet fastening without causing damage to delicate frames. These staples are designed to hold the backing board, mat, and artwork in place effectively. Using narrow crown staplers ensures a professional and clean finish for your framed pictures.
Why is my staple gun not working?
Your staple gun is not working for a variety of reasons: it may have a misfired staple inside the jammed staple gun, the magazine is empty, or the wrong staple size is being used. Another possibility is the insufficient pressure being applied or the mechanical malfunction in the spring/trigger mechanism. Check for blockages, ensure proper staple size, and visually inspect for any visible damage/wear.
Are electric staple guns any good?
Electric staple guns get the job done in many fields, providing the same force every time and saving the user some effort compared to manual models. They are appropriate for upholstery, carpentry, and other DIY projects; they can fasten staples quickly and more conveniently. Corded models ensure non-stop power, while cordless variants provide an advantage in portability. Yet, they are often larger and need a power source. Electric staple guns can be a decent and convenient helper for both professional and amateur workers.
How do I load a Stanley staple gun?
Loading a Stanley staple gun: For safety, make sure it is unplugged or not compressed. Find the release latch or slide in the rear and open the magazine. Place a strip of staples into the magazine, making sure they are facing down. Close the magazine securely until it clicks. Test on scrap material to ensure proper loading.
How to load Arrow T50 staple gun?
Loading an Arrow T50 staple gun: Ensure it is unloaded with the safety on. Press the release latch to open the magazine. In turn, staples are inserted into the magazine, with the legs facing down. Close the magazine until it clicks into place. The gun is cocked by pulling the handle backward until it locks. Always wear safety goggles, and follow the manufacturer’s instructions when using this or any other tool for safe and proper operation.
How do you put staples in a staple gun?
To load staples in a staple gun, for safety, make sure the gun is unplugged or without batteries. Open the magazine by either sliding it out on some models or releasing the latch. Place the strip of staples into the magazine, making sure the legs face down. Securely close the magazine and ensure it locks into place. Give the staple gun a test run on a piece of scrap to confirm that it is loaded properly.
How do you open a staple gun?
To open a staple gun, first, ensure it’s unloaded and not compressed. Locate the release latch or button, typically found near the handle or magazine. Press or slide it to unlock the magazine. Gently pull the magazine out to access the staple chamber. For specific models, refer to the user manual as mechanisms may vary.
How to refill a staple gun?
To refill a staple gun, first ensure it’s unloaded and the safety is on. Open the magazine by releasing the latch or sliding it open. Insert staples into the chamber, ensuring they align with the guide rails and face the correct direction. Close the magazine securely and test the gun on scrap material.
How much is a staple gun?
A staple gun typically costs between 10 to 50, depending on the type and quality. Manual staple guns are the most affordable, ranging from 10 to 10 to 30. Electric or pneumatic models are more expensive, often costing 30 to 30 to 50 or more. Heavy-duty or professional-grade staple guns can exceed $100. Prices vary based on brand, features, and included accessories.
Wrapping Up!
Choosing the best staple guns for picture framing endeavors can make all the difference in achieving professional and lasting results.
Each of the six recommended tools stands out for its unique features, combining durability, precision, and user-friendly design.
Whether you opt for the Logan F500-2, the classic Surebonder 9600B Pneumatic T-50, or the versatile DEWALT – GID-286785, you’re investing in a reliable companion for your DIY framing projects.
From heavy-duty constructions to pneumatic stretching tools and comprehensive kits, these staple guns cater to various needs and skill levels.
Raise your framing experience with one of these top picks, ensuring your cherished memories are showcased with perfection and craftsmanship.